Video manipulation is a complex topic on Android because there is no out-of-the-box support from the Android SDK, and using FFmpeg requires not just a very elaborate setup but having to climb a steep learning curve to learn its CLI commands.
As an aside, we have also put together how-to blogs to elaborate on other video manipulation operations like merging still images to form videos, compressing and resizing videos, or background removal.
The VidEffects library is much faster to set up than FFmpeg, and it works by applying effects to GLSurfaceView. This blog post will demonstrate how to apply Filter effects to a video in an Android app using the VidEffects library.
VidEffects does support storing videos on the disk, but it has limitations in this regard which we will discuss in a moment.
Before we begin, keep in mind that the VidEffects library differentiates between Effects and Filters. As an example, we will apply both and discuss the crucial difference between the two.
Without much further ado, let's start coding.
Create a VidEffects Example App
Create a New Project with an Empty Activity in Android Studio. Select Kotlin as the language (or Java if you wish), and set **Minimum SDK to API 21.
You can also download the final code from GitHub.
Add Dependency
In your module-level build.gradle (app/build.gradle) file add the latest VidEffects dependency.
dependencies {
    ...

    implementation "com.github.krazykira:videffects:1.1.1"

    ...
}
Next, enable viewBinding by adding the following lines within the android{} closure.
android {
    ...
    buildFeatures {
        viewBinding true
    }
}
By using View Binding, we can avoid the findViewById() method.
Click Sync Now to sync the project with gradle files.
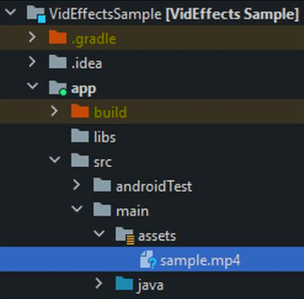
Add Video Asset File
Place the sample video file in app/src/main/assets/ directory. Ideally, your app will load the video file from disk – but to avoid complexity, we are placing the video in the assets directory.
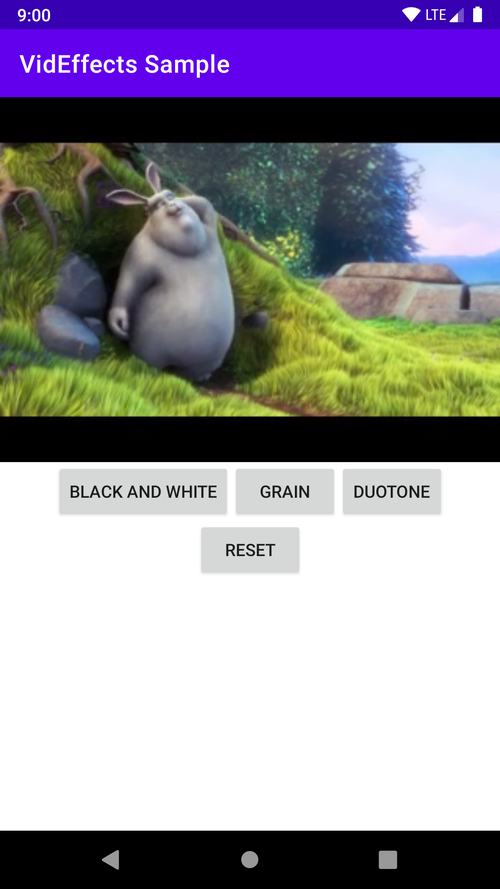
Create a Layout

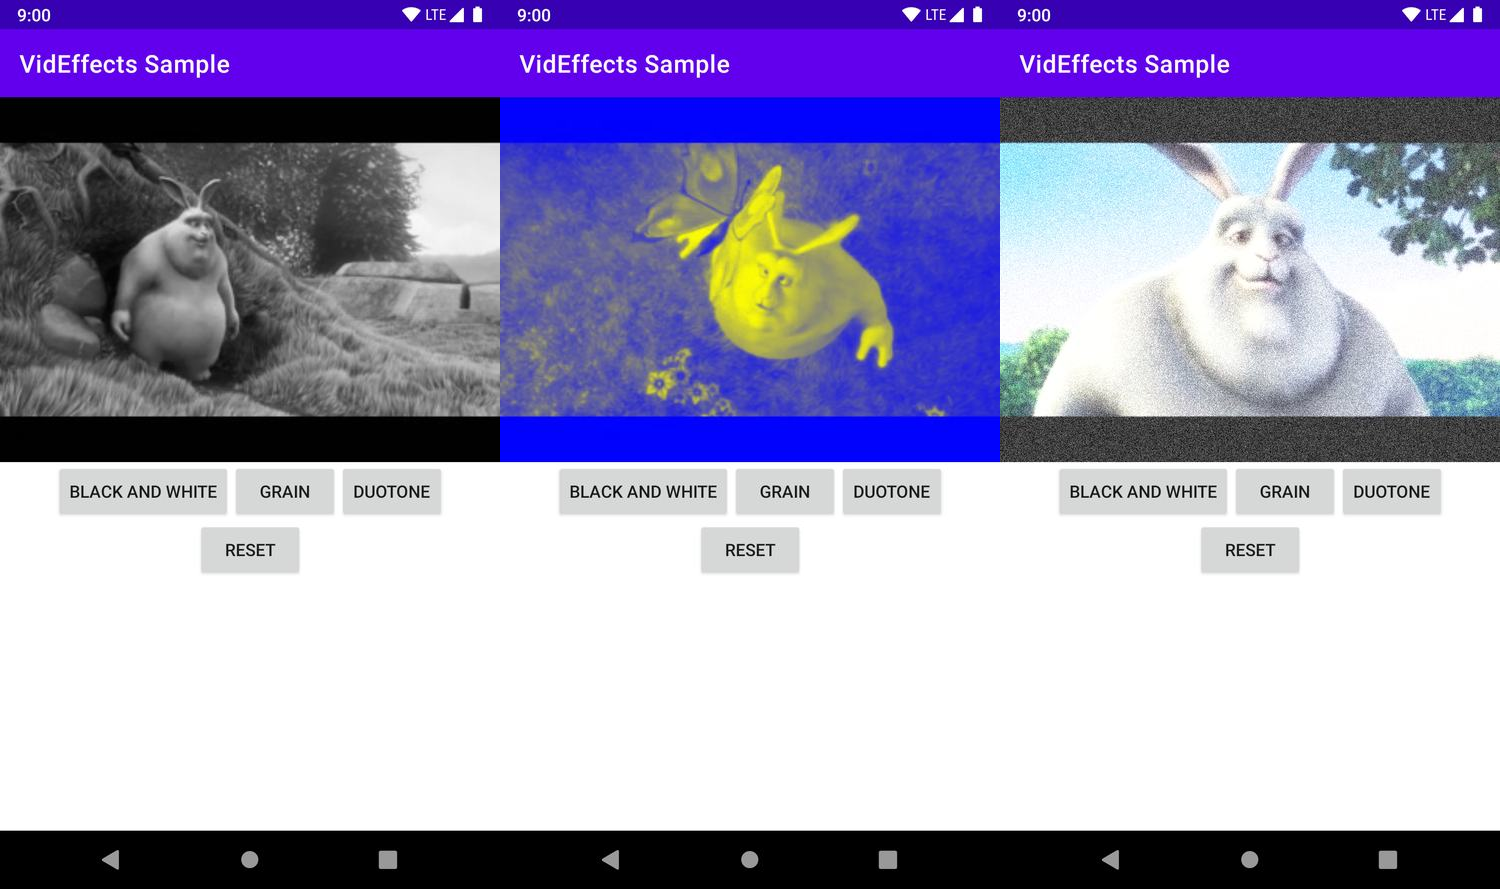
Create the above layout with a VideoSurfaceView, three Filter buttons, and one Reset Button.
Replace your activity_main.xml`s code with the following.
<androidx.constraintlayout.widget.ConstraintLayout xmlns:android="http://schemas.android.com/apk/res/android"
    xmlns:app="http://schemas.android.com/apk/res-auto"
    xmlns:tools="http://schemas.android.com/tools"
    android:layout_width="match_parent"
    android:layout_height="match_parent"
    tools:context=".MainActivity">
    <com.sherazkhilji.videffects.view.VideoSurfaceView
        android:id="@+id/mVideoSurfaceView"
        android:layout_width="match_parent"
        android:layout_height="300dp"
        app:layout_constraintTop_toTopOf="parent" />
    <androidx.constraintlayout.widget.ConstraintLayout
        android:id="@+id/wrapper"
        android:layout_width="wrap_content"
        android:layout_height="wrap_content"
        app:layout_constraintEnd_toEndOf="parent"
        app:layout_constraintStart_toStartOf="parent"
        app:layout_constraintTop_toBottomOf="@id/mVideoSurfaceView">
        <androidx.appcompat.widget.AppCompatButton
            android:id="@+id/bwButton"
            android:layout_width="wrap_content"
            android:layout_height="wrap_content"
            android:text="Black and White"
            app:layout_constraintStart_toStartOf="parent"
            app:layout_constraintTop_toTopOf="parent" />
        <androidx.appcompat.widget.AppCompatButton
            android:id="@+id/grainButton"
            android:layout_width="wrap_content"
            android:layout_height="wrap_content"
            android:text="Grain"
            app:layout_constraintStart_toEndOf="@id/bwButton"
            app:layout_constraintTop_toTopOf="parent" />
        <androidx.appcompat.widget.AppCompatButton
            android:id="@+id/duotoneButton"
            android:layout_width="wrap_content"
            android:layout_height="wrap_content"
            android:text="DuoTone"
            app:layout_constraintStart_toEndOf="@id/grainButton"
            app:layout_constraintTop_toTopOf="parent" />
    </androidx.constraintlayout.widget.ConstraintLayout>
    <androidx.appcompat.widget.AppCompatButton
        android:id="@+id/resetButton"
        android:layout_width="wrap_content"
        android:layout_height="wrap_content"
        android:text="Reset"
        app:layout_constraintEnd_toEndOf="parent"
        app:layout_constraintStart_toStartOf="parent"
        app:layout_constraintTop_toBottomOf="@+id/wrapper" />
</androidx.constraintlayout.widget.ConstraintLayout>
Initialize the video
Before initializing the video, set up an instance of the Binding class to use it within the Activity.
Setup View Binding
Add the following code in MainActivity.kt before calling setContentView().
If you do not wish to use View Binding and instead prefer using findViewById(), skip to the next step Initializing the Sample Video.
private lateinit var binding: ActivityMainBinding
class MainActivity : AppCompatActivity() {
		private lateinit var binding: ActivityMainBinding
    override fun onCreate(savedInstanceState: Bundle?) {
        super.onCreate(savedInstanceState)
        binding = ActivityMainBinding.inflate(layoutInflater)
        ...
    }
    companion object {
        private const val TAG = "MainActivity"
    }
}
The ActivityMainBinding class is auto-generated. If it did not get auto-generated, then sync the project with the gradle file from File > Sync Project with Gradle Files.
Next, pass the root view to the setContentView().
class MainActivity : AppCompatActivity() {
    ...
    override fun onCreate(savedInstanceState: Bundle?) {
        ...
        setContentView(binding.root)
    }
}
Initializing the Sample Video
Next, declare and initialize the MediaPlayer variable.
class MainActivity : AppCompatActivity() {
    ...
    private lateinit var mMediaPlayer: MediaPlayer
        override fun onCreate(savedInstanceState: Bundle?) {
            ...
            mMediaPlayer = MediaPlayer()
    }
}
Then open the video file from our assets directory and pass it as the data source to the Media Player.
override fun onCreate(savedInstanceState: Bundle?) {
    ...
    try {
        val afd = assets.openFd("sample.mp4")
        mMediaPlayer.setDataSource(
            afd.fileDescriptor,
            afd.startOffset, afd.length
        )
    } catch (e: Exception) {
        Log.e(TAG, e.message, e)
    }
}
Now, all that is remaining is to initialize the VideoSurfaceView.
override fun onCreate(savedInstanceState: Bundle?) {
        ...
        binding.mVideoSurfaceView.init(mMediaPlayer, NoEffectFilter())
    }
Your app should run. While the buttons still do not work, we will setOnClickListeners() next.
Apply VidEffects Effects
The VidEffects library offers multiple effects, but we will be applying three: Black and White, Grain, and Duotone.
In MainActivity's onCreate(), copy the following code to setup all the setOnClickListeners.
override fun onCreate(savedInstanceState: Bundle?) {
    ...
    //Black and White Effect
    binding.bwButton.setOnClickListener {
        binding.mVideoSurfaceView.shader = BlackAndWhiteEffect()
    }
    //Grain Filter
    binding.grainButton.setOnClickListener {
        val grainFilter = GrainFilter(10, 10)
        grainFilter.setIntensity(0.5f)
        binding.mVideoSurfaceView.filter = grainFilter
    }
    //Duotone Effect
    binding.duotoneButton.setOnClickListener {
        binding.mVideoSurfaceView.shader =
            DuotoneEffect(Color.BLUE, Color.YELLOW)
    }
    //Reset with AutoFixFilter
    binding.resetButton.setOnClickListener {
        binding.mVideoSurfaceView.filter = NoEffectFilter()
    }
}
Run the app.
Difference Between Effects and Filters
As mentioned before, Effects and Filters are two separate functions in the VidEffects library.
Effects are temporary, view-only overlays that cannot be stored on the disk. Filters can be viewed and stored on the disk. Unfortunately, a majority of the overlays offered by VidEffects are Effects and therefore only useful for playback only. At the time of writing this article, only three Filters are available.
Limitations
One of the biggest limitations of this library, as mentioned above, is that the majority of the effects provided by the library are just view-only.
Moreover, to save videos with filters, the app must target minSdk 23 at least or use FFmpeg.
Many of these Effects do not have an intensity parameter and therefore we cannot fine-tune these effects.
Alternative
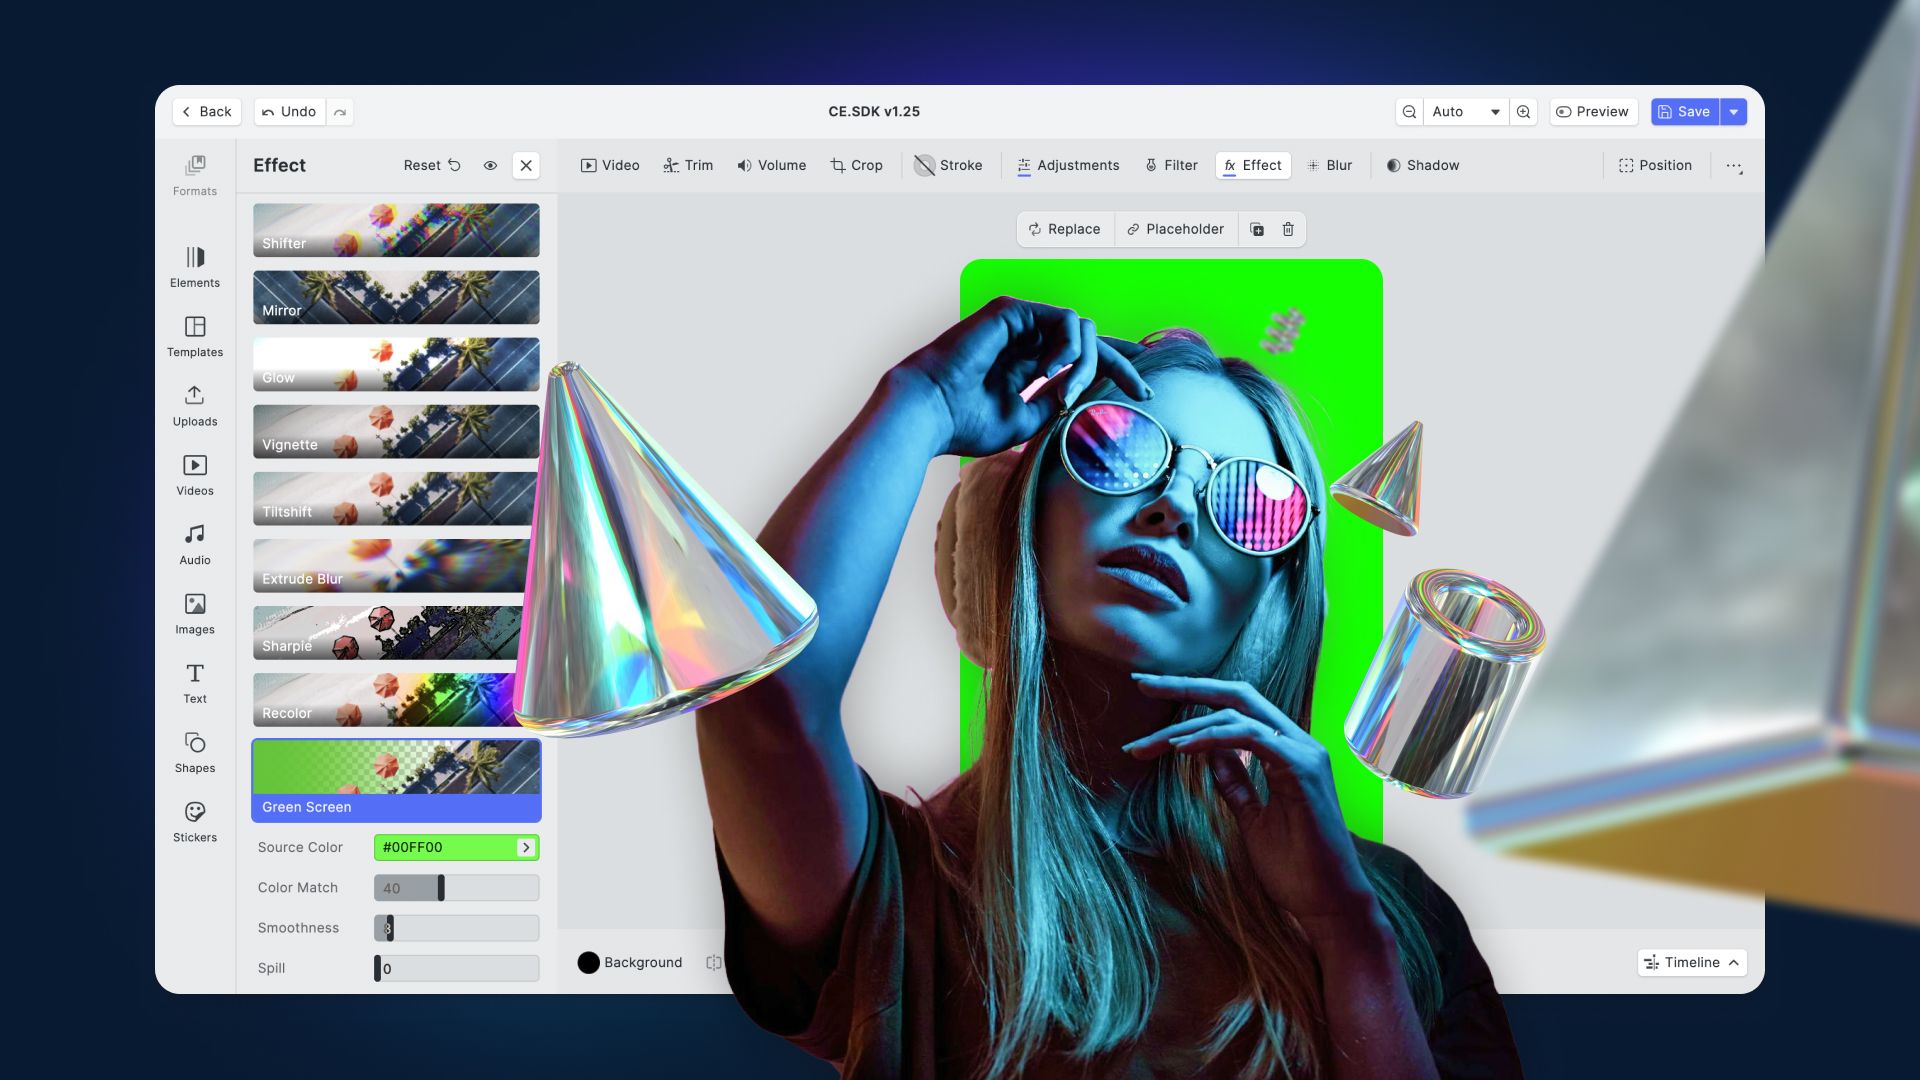
If you are looking for an easy-to-integrate solution that overcomes these limitations, take a look at IMG.LY's VideoEditor SDK. It provides more than 60 high-quality adjustable filters out-of-the-box. Moreover, you can easily add custom filters using LUT files. VideoEditor SDK works for Android SDK version 21 and above and thus targets more devices.
If the purpose is to apply effects during the playback, the VidEffects library is a solid and free open-source solution. While it handles all the complex video editing, developers will have to spend some time developing the layout.